
Out of Studio. Shop purchases made will be shipped on June 30, 2026. STRONGFELT apologies for any inconvenience. Dismiss
I sat down the other morning before my eyes were fully open, but with the clarity of thought to write out the content description for Course 2, Applications of Partial Felt in my Felt Jewelry Series: Material, Technique & Impact. You can have a read over on the Online & Onpoint! Coursework page under Course 2, where I define this term Partial Felt that I coined (vs the term Pre-felt) and describe the foundational ways I use it in my work from shaping solid forms to patterning surfaces and sculpting form.
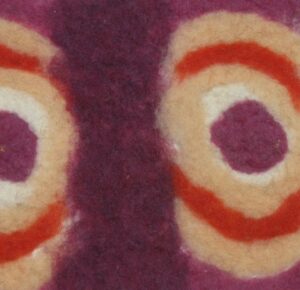
I was recently entertained by looking at some of the VERY FIRST attempts I made at patterning felt (making distinct color areas) back in the early 2000’s while a resident artist at the Appalachian Center for Craft in TN. Here, I had laid fibers of different colors next to one another to create a felt that was the same front side and back. Indeed, the same irregularity of edges, holes and weak spots between colors on both sides because I was trying to keep the colors distinct rather than make a consistent and strong piece of felt! Ha!
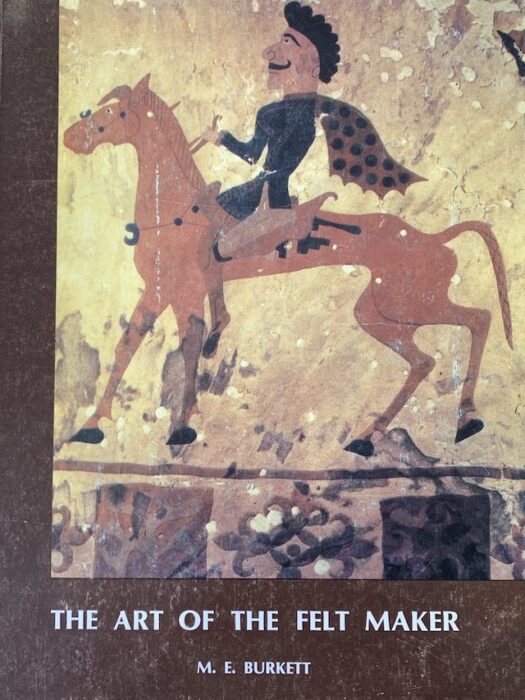
Then, I paid attention to the cover of “The Art of the Felt Maker,” a book I had been given by Janet Taylor who I was honoured to have assisted in a weaving concentration at Penland School of Crafts in 2002. Compiled by Mary Burkett and published by Abbot Hall Art Gallery in relation to an exhibition of the same name that travelled throughout the UK in 1979, the cover is a detail of a wall hanging from the Pazyrk Burial Mounds in the Altai Mountains that was unearthed among items dated from the 7th-2nd Century B.C.
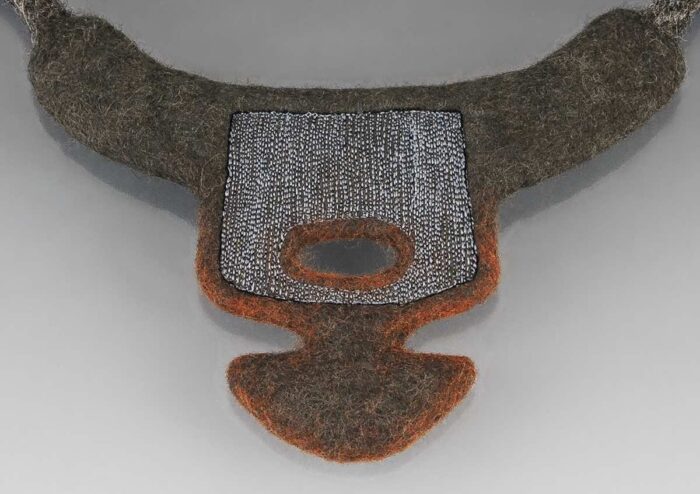
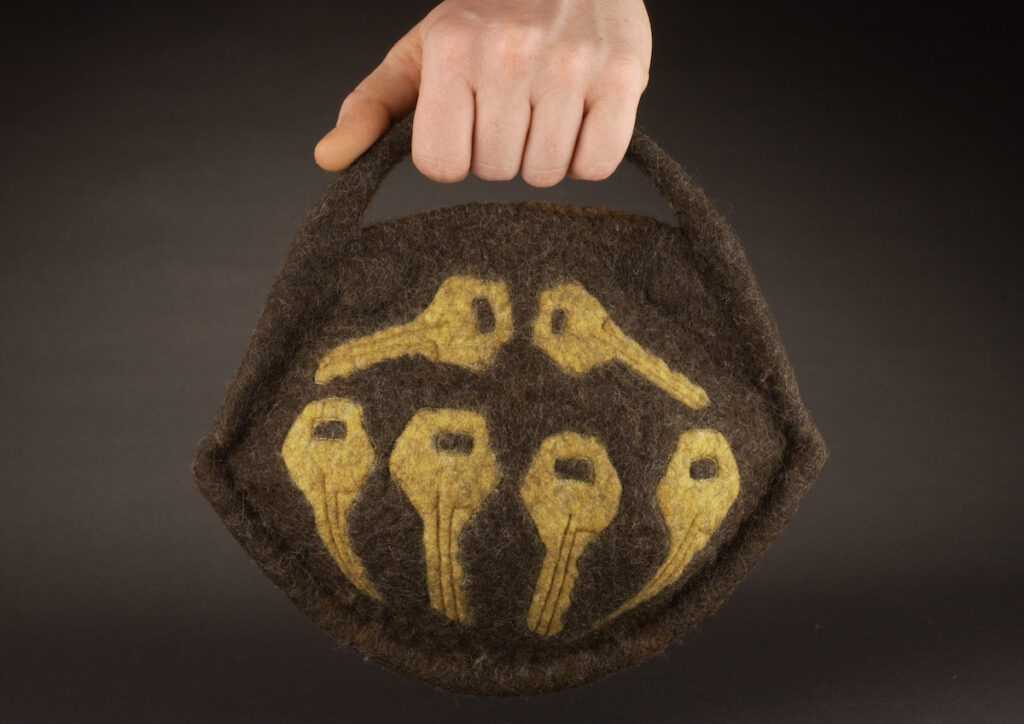
The only means I could think of to achieve such fine shapes/imagery over 2000 years ago would have been to partially felt fine sheets, cut and organize the shapes into images and then felt them into/onto a background of fiber. As natural dyes, of course, were only available at that time, I eventually experimented with felting sheets first and then dyeing them as a piece vs as fiber. An example of this work is my Key Handbag from 2004 pictured at the end of this post. The concept of Partial Felt was and would continue to be key to my felting practice.
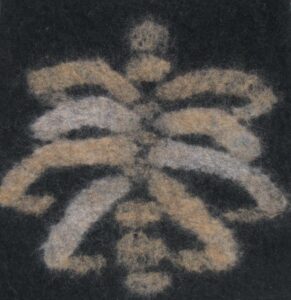
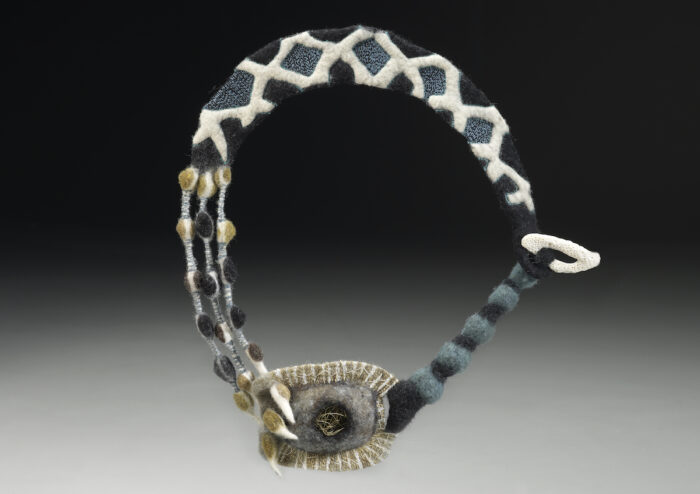
However, I first began felting sheets of commercially dyed wool and cutting them up to make shapes of various sizes based on a less than accurate means of knowing how integrated a piece of felt was. These ideas might seem familiar…use 7 layers of wool or roll 20 times or for 20 minutes and then cut. One person’s 7 layers will be thicker or thinner than another’s and one person’s roll will be stronger or more vigorous than another’s depending on whether they had a hardy breakfast or have arthritic hands, etc. My FIRST PARTIAL FELT shapes, likes this spider inspired design, would fall apart-disintegrating at the edges depending on the size I cut them and that wasn’t the only reason…
I’d argue that the human is the biggest variable in the felting process as the agitator and dictator of felting conditions! Ha! I found that tracking my felt by weight per specific area and at what point in the spectrum of shrinkage possible for that weight that I cut my shapes is the most reliable control to create desired outcomes, like edge definition. Felt is a relation of mass and space and with more space remaining in the felt the fiber lengths are not yet highly intertwined, so when cut into small sections, they simply aren’t bound to the mass and blur the cut edge.
I also found with having this increased level of control so much more was possible with the application of Partial Felt than I had imagined when first inspired by the historic felt pictured on that cover. Above are examples from my work of the shaping, patterning and forming that will be covered in Course 2 in my Online & Onpoint Felt Jewelry Series. Disclaimer: Free-motion machine stitching won’t be covered in this course, but rather will be part of Course 3 with a focus on TEXTURE!
Subscribe to the STRONGFELT MAILING LIST to receive quarterly newsletters (ideally!) on Lisa Klakulak’s: studio work, workshop & online course offerings, open studio events, exhibitions and publications, work with children and travel inspiration.
email : info@strongfelt.com
website by jennifer drum
© 2025 STRONGFELT. All Rights Reserved.